
0. How to Use Waappa
Choose the integration path that matches your workflow before using the endpoint reference.
Create a Waappa Account
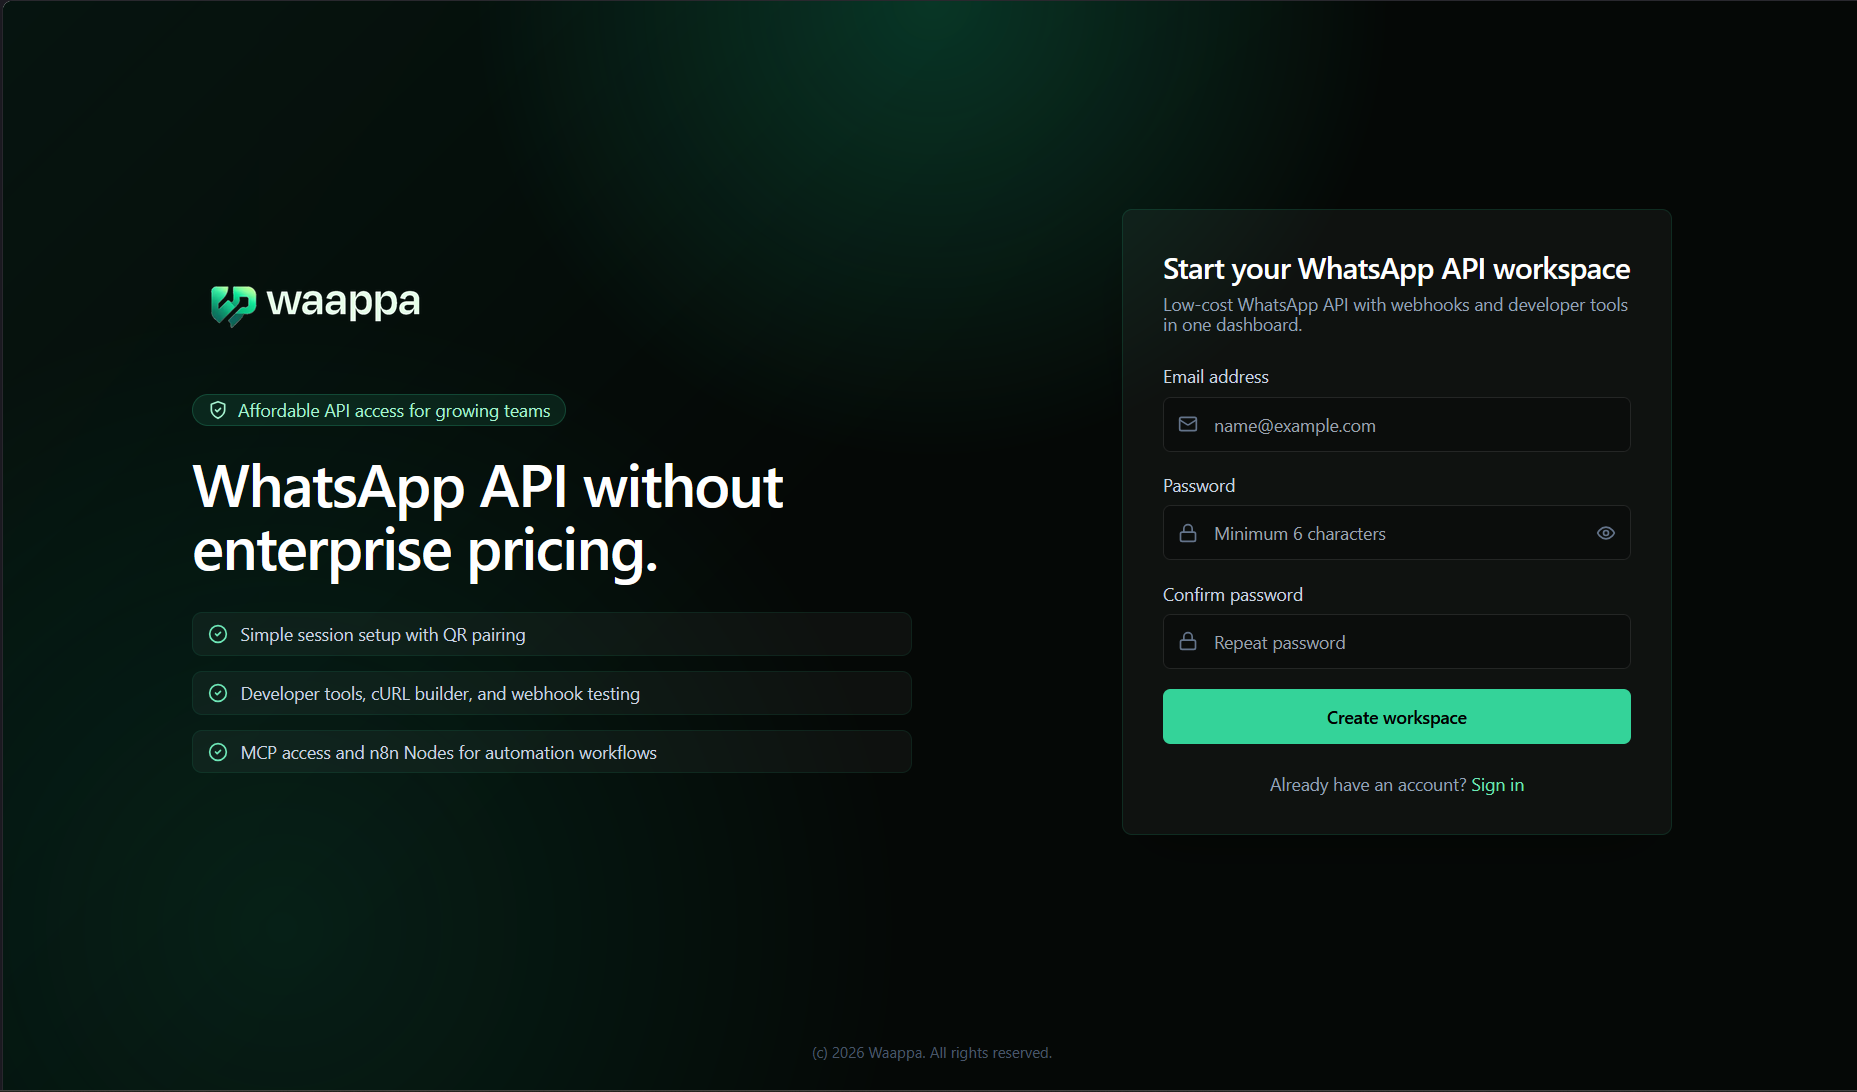
Start by creating your Waappa workspace. Open https://dev.waappa.com/signup, enter your email address, set a secure password, and click **Create Workspace**. This creates your Waappa login and takes you into the plan selection flow.
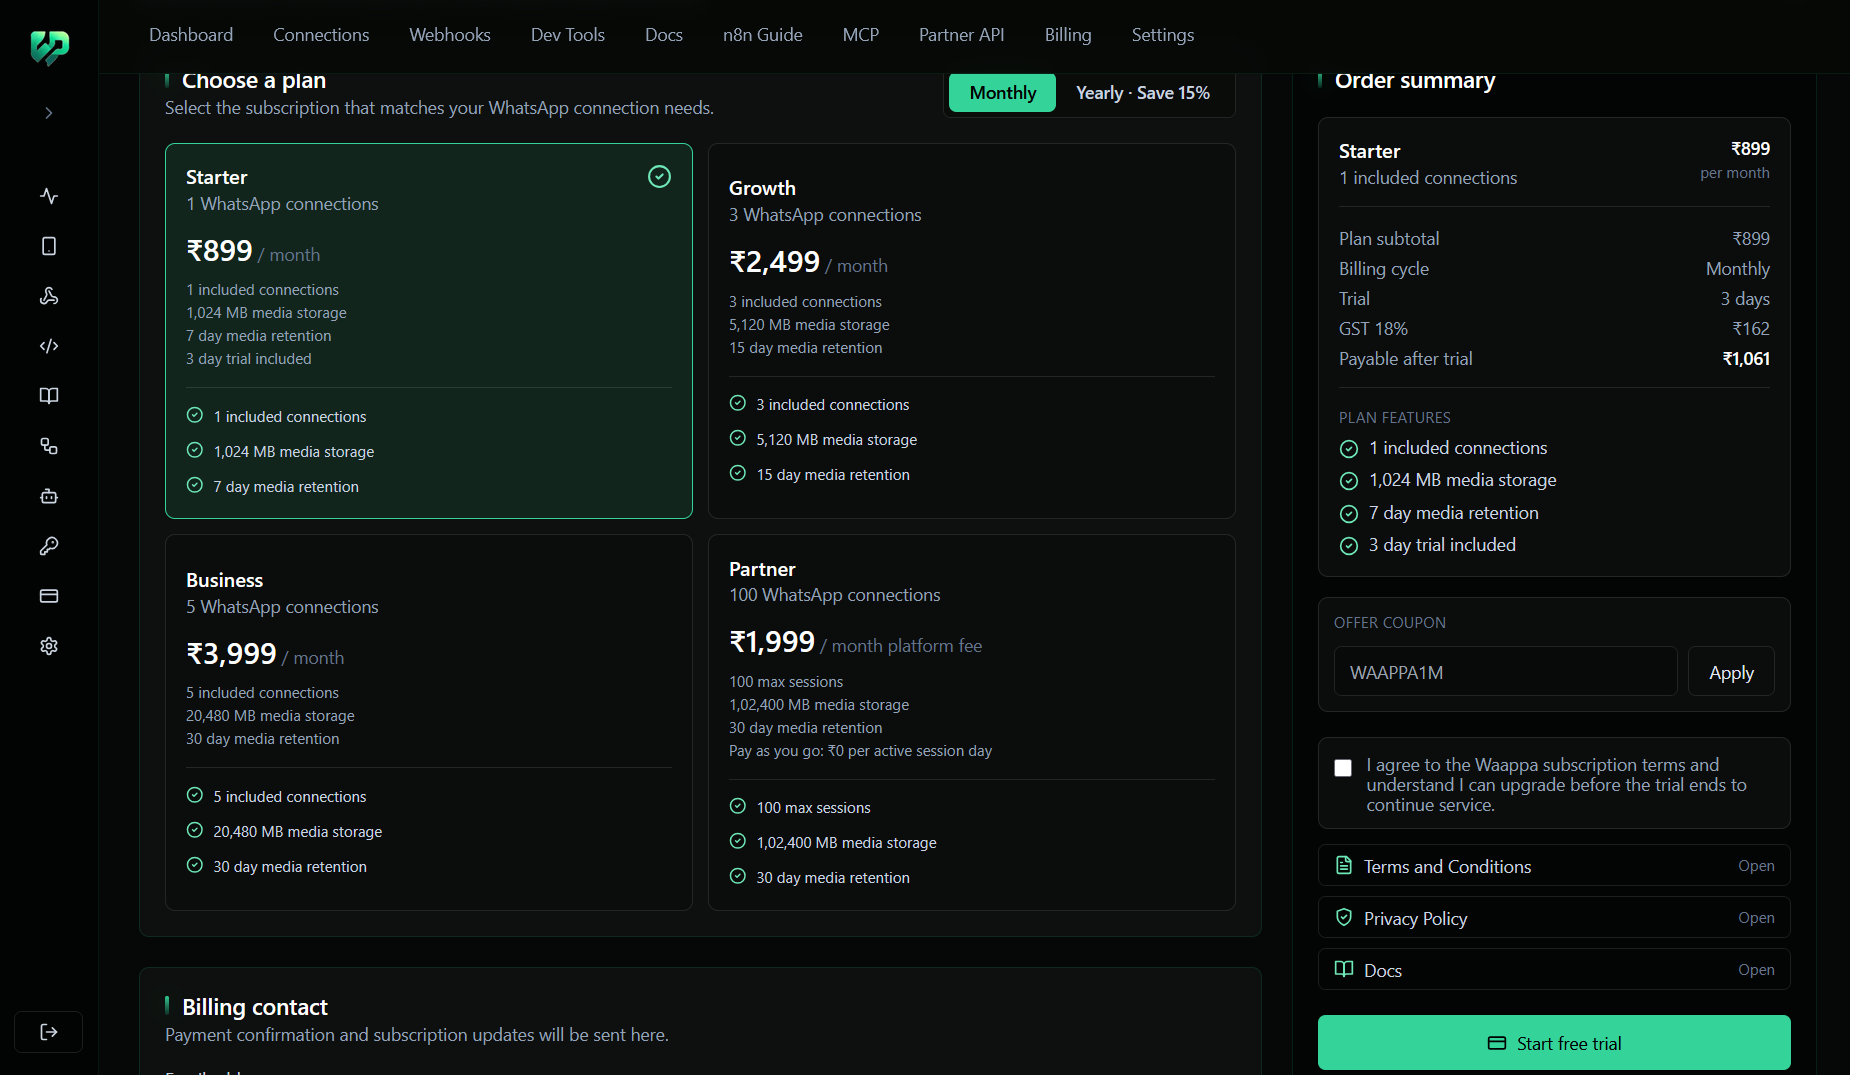
On the checkout page, choose the plan that matches how many WhatsApp connections you need. If you only want to test the product first, use the available Starter trial. If you choose a paid plan, Waappa opens Razorpay so you can complete payment using UPI, card, or net banking.
Create and Connect a WhatsApp Session
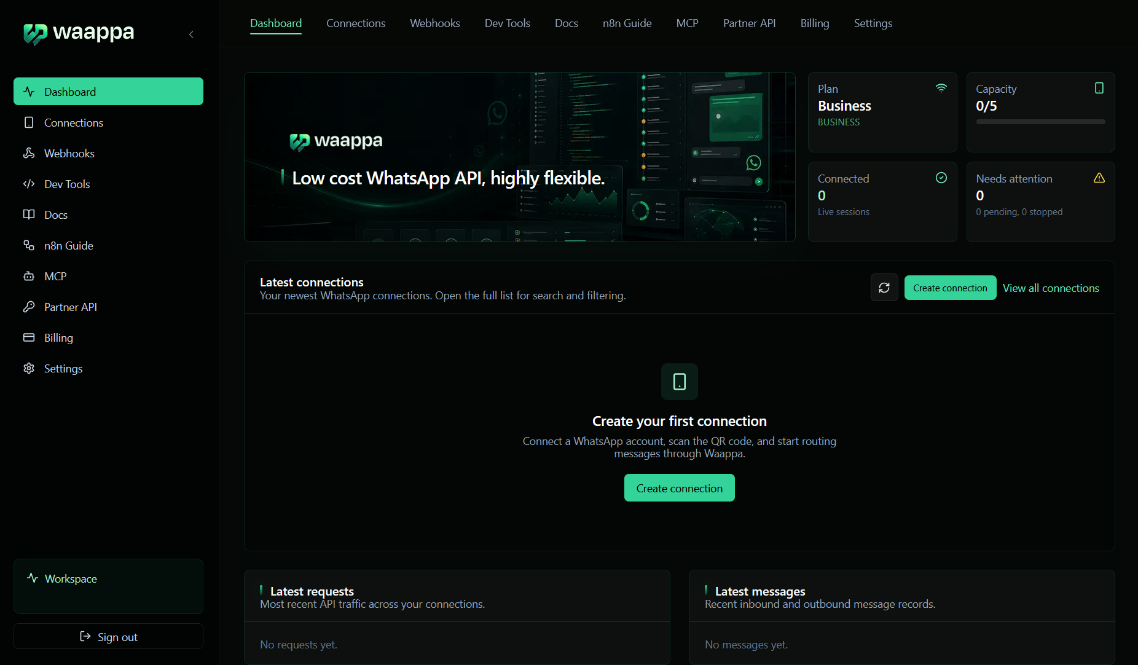
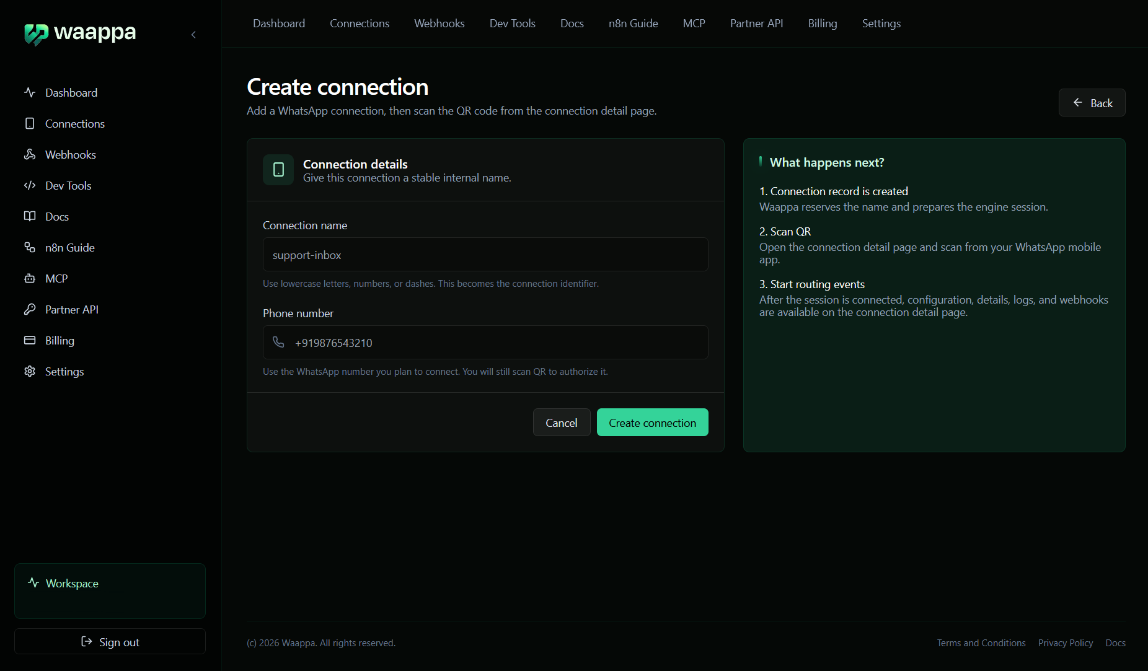
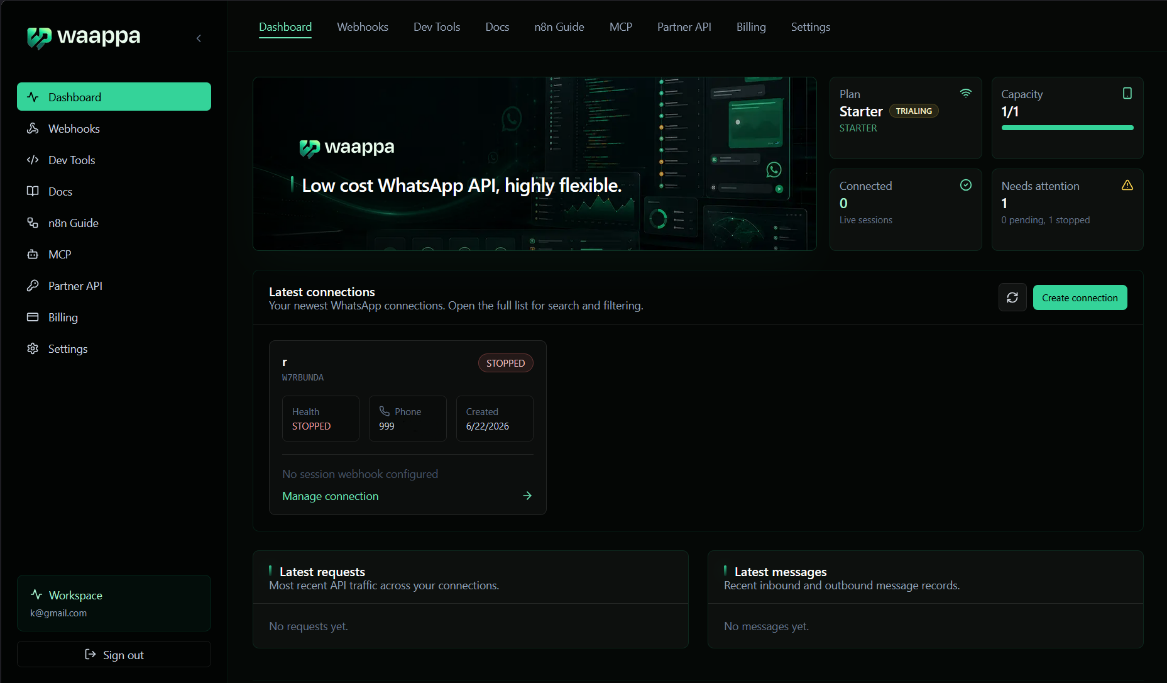
A session is one WhatsApp connection in Waappa. In the dashboard, click **Create connection** to add a new WhatsApp account. Give the connection a clear name, add the phone number for your reference, and submit the form.
After the connection appears on the dashboard, open **Manage connection**. Start the session so Waappa can prepare the QR code. When the QR code appears, open WhatsApp on your phone, go to **Linked Devices**, and scan the QR code.
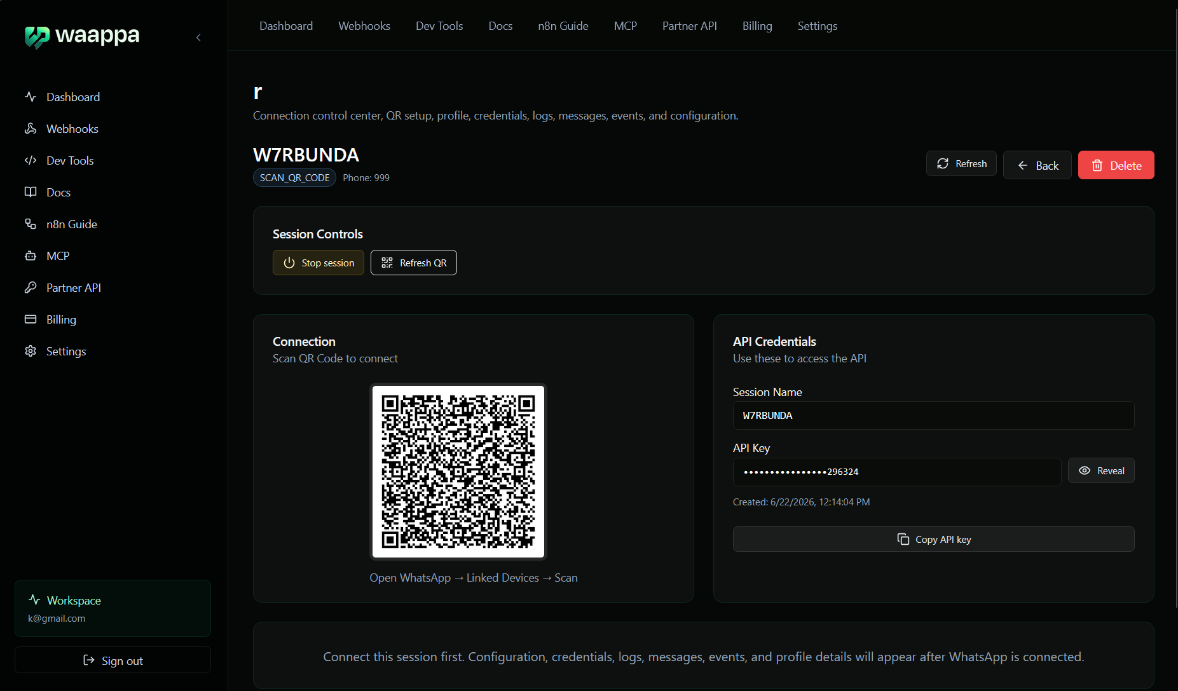
If you cannot scan a QR code, switch the connection card to **Pairing code**, enter the WhatsApp number with its country code, and request a code. On the phone choose **Linked Devices -> Link with phone number instead** and type the code shown in the dashboard.
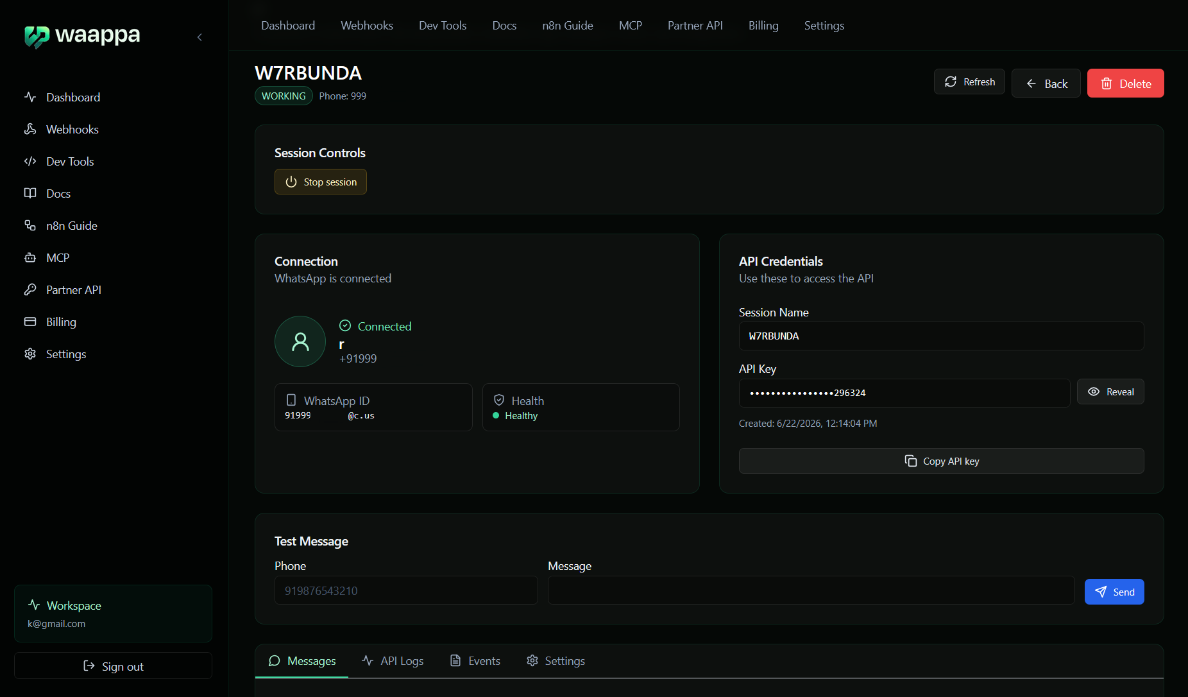
Once connected, use the test message area to confirm that the session can send messages. Enter a known WhatsApp number and send a simple test message before using the session in automation.
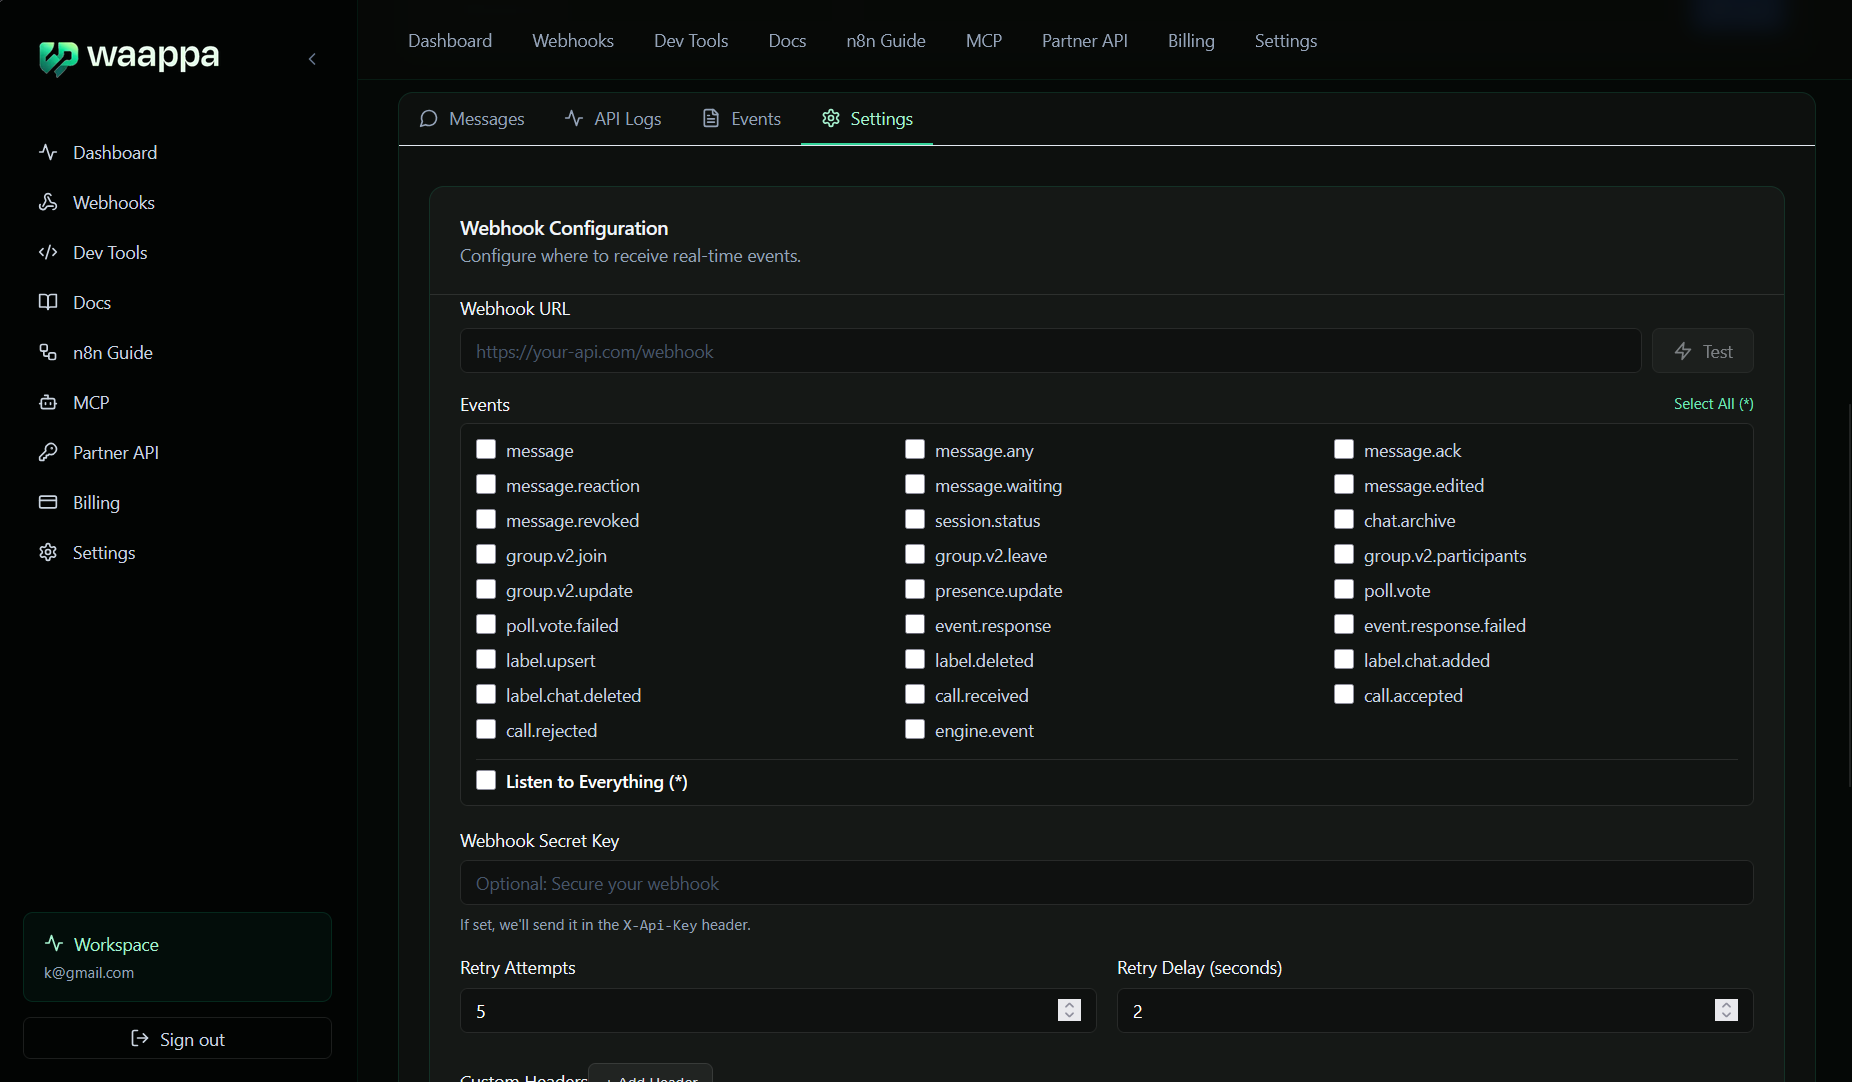
To receive incoming messages and status updates, open the webhook settings for the session. Add your webhook URL, select the events your app needs, optionally add a webhook secret key, save the settings, and click **Test** to confirm delivery.
REST API
Use REST API when you are building a backend, SaaS product, dashboard, internal tool, or custom automation service.
| Step | Action |
|---|---|
| 1 | Create or choose a WhatsApp session. |
| 2 | Start the session and scan the QR code. |
| 3 | Call message, contact, group, label, or channel endpoints. |
| 4 | Listen to webhook events for replies, delivery, and session status. |
n8n Nodes
Use Waappa n8n nodes when you want WhatsApp automation without writing a custom backend. A typical workflow connects Waappa to CRM tools, Google Sheets, databases, AI agents, reminders, support routing, payment alerts, or monitoring flows.
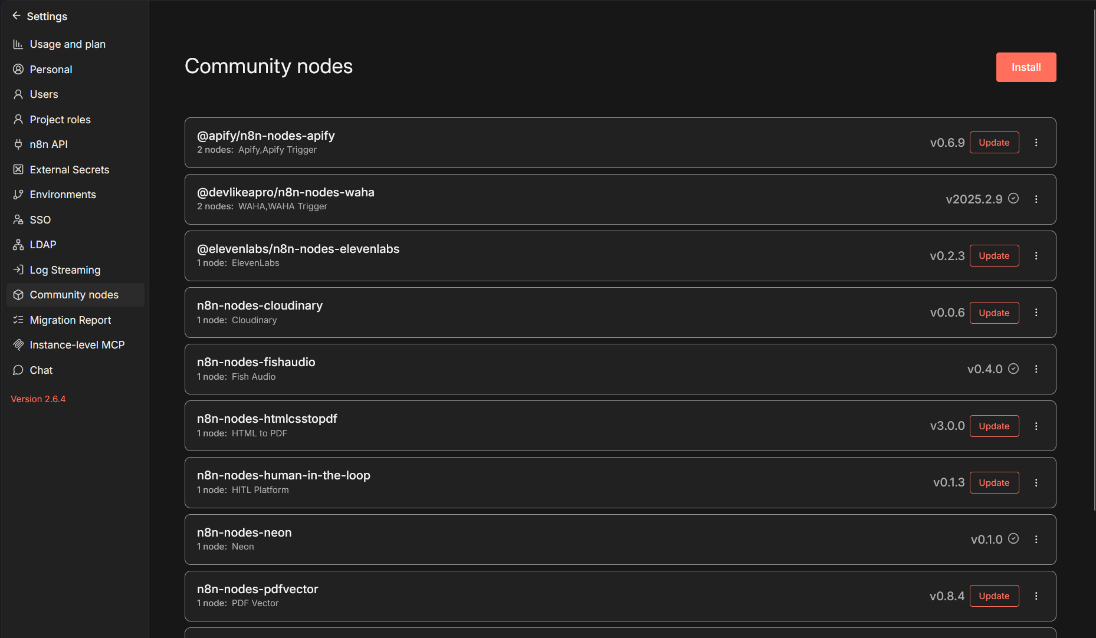
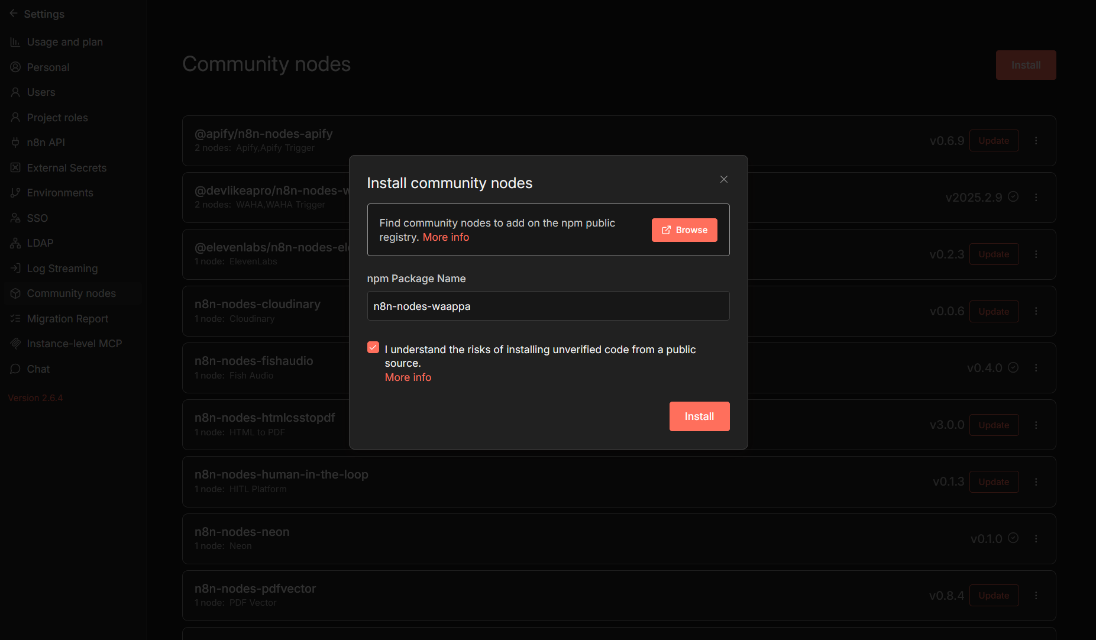
First, open your n8n workspace and go to **Settings → Community Nodes**. Click **Install a community node**, enter n8n-nodes-waappa, accept the community node notice, and install it.
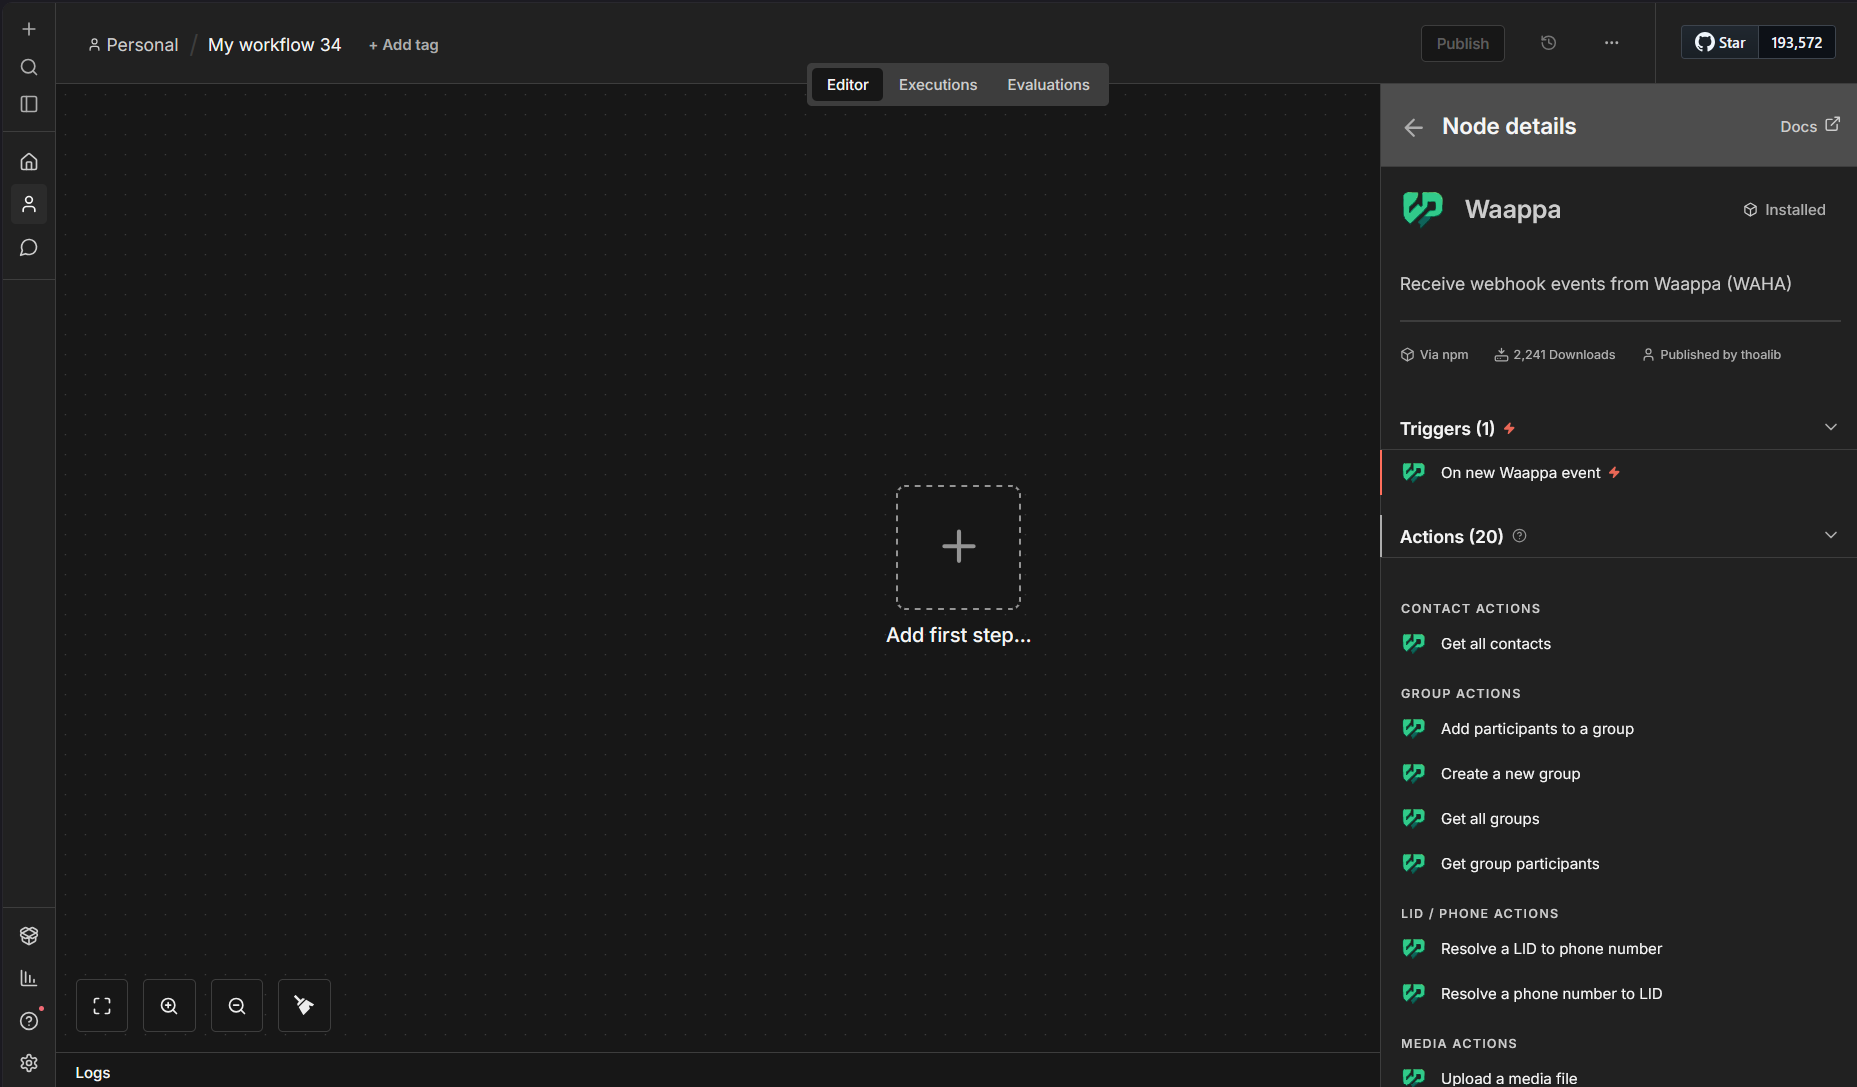
After installation, create a workflow and search for **Waappa**. You can use Waappa action nodes to send messages, send media, check sessions, and build process automation from other n8n apps.
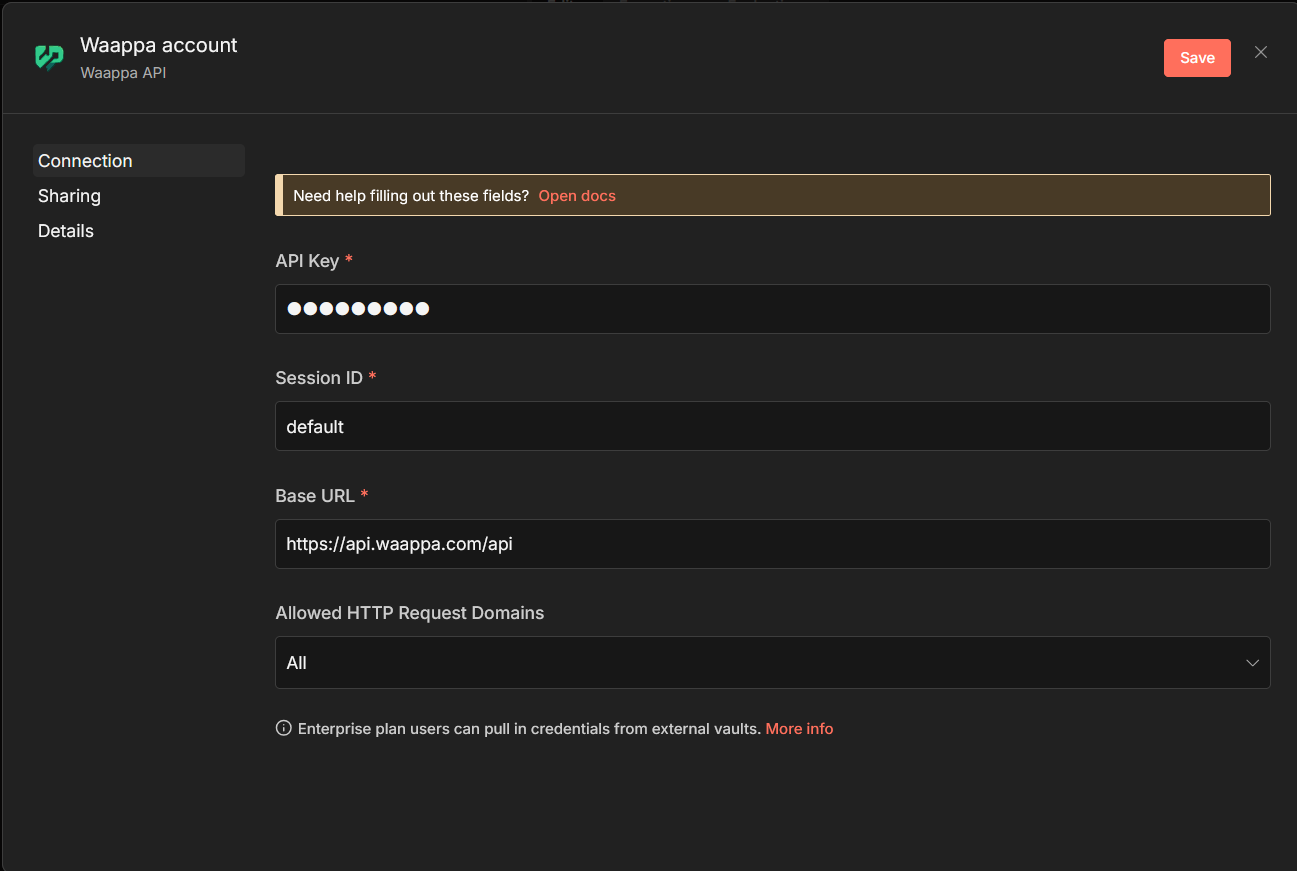
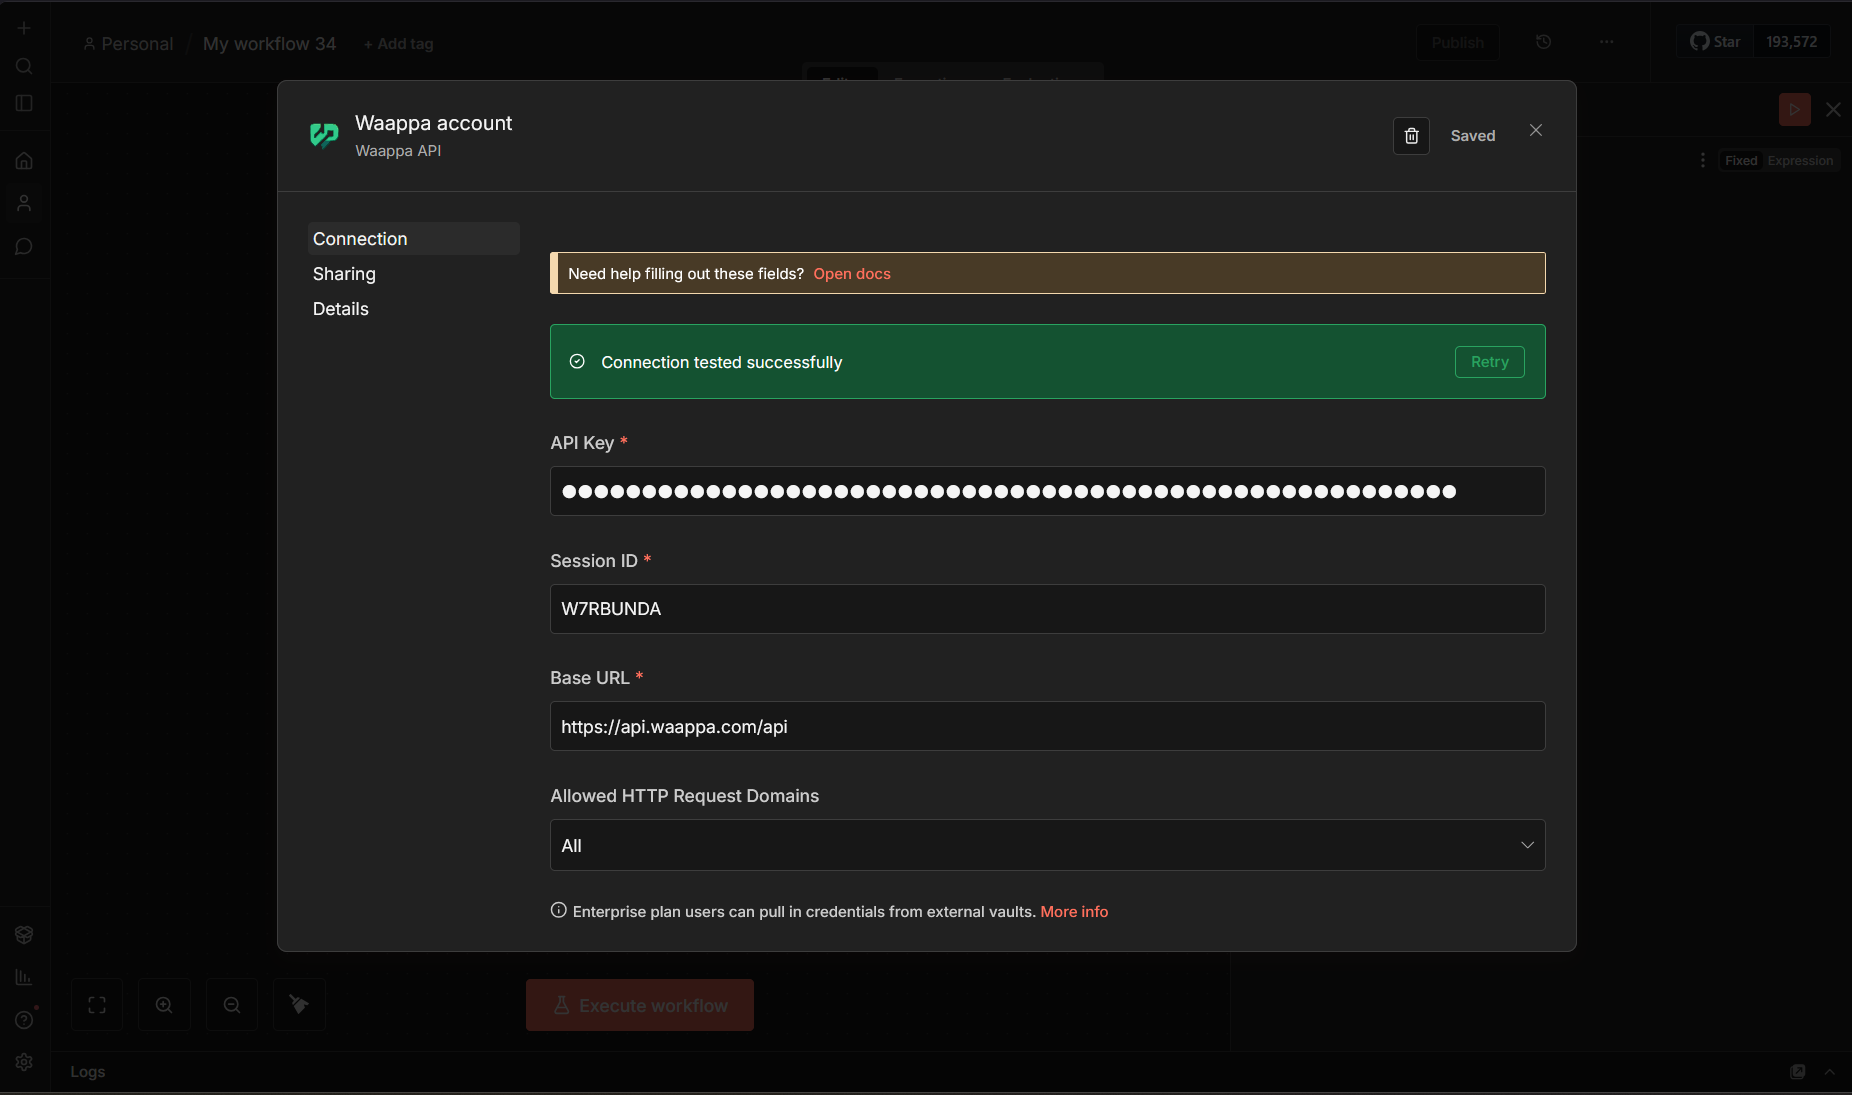
Next, add Waappa credentials. Use the session name from your Waappa dashboard and the matching session API key. If you are building account-level automation for Business or Partner plans, use the master key only for supported admin operations.
| Workflow type | How to build it |
|---|---|
| Sales assistant | Use a Waappa trigger for new WhatsApp messages, classify the lead with AI, update the CRM, and send a reply or handoff message. |
| Reminder workflow | Read reminders from Google Sheets, database, or CRM, wait until the due time, then send WhatsApp text/media with safe delays. |
| WhatsApp CRM | On new inbound messages, create or update contacts, labels, lead stage, notes, and follow-up tasks. |
| Support routing | Detect intent, route billing/support/sales messages to the right team, and notify internal groups. |
| Process automation | Trigger invoices, order updates, appointment confirmations, documents, polls, or location sharing from business systems. |
| Monitoring alerts | Send alerts to WhatsApp groups/channels when uptime, payment, server, or workflow checks fail. |
For inbound automation, add the **Waappa Trigger** node and select the shared **Waappa API** credential. Open **Configure in Waappa**, select the session, choose the events and any ignore options, and save the configuration. Then activate the n8n workflow: n8n automatically registers its production webhook URL and generated secret with Waappa. You do not need to copy a URL or configure header authentication manually.
MCP Tools
Use MCP when an AI assistant needs controlled WhatsApp tools instead of full backend access.
| Step | Action |
|---|---|
| 1 | Expose safe WhatsApp actions as tools. |
| 2 | Limit tool permissions by session and action type. |
| 3 | Require human approval for sensitive sends when needed. |
| 4 | Log every assistant action for audit and debugging. |
AI Agents
Use AI agents when WhatsApp messages should be classified, summarized, answered, routed, or escalated.
| Step | Action |
|---|---|
| 1 | Receive inbound message events through webhooks. |
| 2 | Classify intent and retrieve context from CRM or database. |
| 3 | Generate or draft a reply with the AI agent. |
| 4 | Send the response through Waappa or hand off to a human. |
Webhooks
Use webhooks when your app needs to react to WhatsApp events in real time.
| Step | Action |
|---|---|
| 1 | Set the webhook URL in session config. |
| 2 | Select event types like message, message.ack, and session.status. |
| 3 | Verify, store, and retry event processing safely. |
| 4 | Trigger sales, support, CRM, monitoring, or AI workflows from payloads. |
Groups & Channels
Use groups and channels for internal operations, community workflows, field teams, monitoring alerts, and broadcast-style updates where supported.
| Step | Action |
|---|---|
| 1 | Use a group @g.us or channel @newsletter chatId. |
| 2 | Send alerts, updates, documents, images, or videos. |
| 3 | Track participants, group events, and message status. |
| 4 | Use pacing, opt-in context, and safe automation practices. |